Get Email Notifications When a New Admin Is Added in WordPress (Easy Guide)

Hey friends! 👋

If you’re managing a WordPress site and care even a little bit about security, this one’s for you.

🔒 Why You Should Care About New Admin Users

In WordPress, users with the Administrator role have full control — they can install plugins, edit themes, delete content, change settings, and even remove other admins. 😳

So imagine someone adds a new admin without you knowing. That’s a big security risk.

✅ What We’re Going to Do

We’ll write a simple code snippet that sends an email notification every time:

  • A new user is registered as an Administrator

  • An existing user’s role is changed to Administrator

This is perfect for WordPress site owners, web developers, security-conscious admins, or even agencies managing client websites.

📜 Code to Send Email Alerts When a New Admin Is Added

Just copy this code and paste it into your theme’s functions.php file or create a mini plugin:

// Notify when a new admin is registered
function notify_on_new_admin_registration($user_id) {
$user = get_userdata($user_id);
if (in_array('administrator', (array) $user->roles)) {
send_admin_alert_email($user);
}
}
add_action('user_register', 'notify_on_new_admin_registration');

// Notify when an existing user's role is changed to admin
function notify_on_admin_role_change($user_id, $old_user_data) {
$user = get_userdata($user_id);
$old_roles = (array) $old_user_data->roles;
$new_roles = (array) $user->roles;

// If user wasn't an admin before, but now is
if (!in_array('administrator', $old_roles) && in_array('administrator', $new_roles)) {
send_admin_alert_email($user);
}
}
add_action('profile_update', 'notify_on_admin_role_change', 10, 2);

// Shared function to send email
function send_admin_alert_email($user) {
$to = 'test1@gmail.com, test2@gmail.com, test3@gmail.com';
$subject = 'Administrator Role Assigned';
$message = "A user has been assigned the Administrator role:\n\n";
$message .= "Username: " . $user->user_login . "\n";
$message .= "Email: " . $user->user_email . "\n";
$message .= "Updated: " . current_time('mysql');

wp_mail($to, $subject, $message);
}


📨 Who Gets the Email Notification?

Right now, the email goes to:

You can easily change or add more recipients — just edit the $to variable in the code.


⚠️ Bonus Tip: Make Sure WordPress Can Send Emails

Sometimes WordPress email notifications don’t work because your server blocks them or your emails land in spam. To fix this, I highly recommend using the WP Mail SMTP plugin. It connects your WordPress site to Gmail, Outlook, or any SMTP provider so emails send reliably.


🚀 Final Thoughts

This is a simple but powerful trick to keep your WordPress site secure. You’ll always know when a new admin is added — either during registration or by someone editing a user.

No more surprises. No more silent admin access.

Let me know if you want me to turn this into a small plugin for your site. Happy coding! 👨‍💻✨

Shopify Thank You & Order Status Pages Update – What You Need to Do

Shopify has announced an important update for non-Plus merchants regarding the Thank You and Order Status pages. By August 26, 2026, all stores must migrate their customizations to the new system. The old method using Additional Scripts and ScriptTags will no longer work.

What Are the Thank You & Order Status Pages?

Thank You Page: This page appears after checkout and is often used for conversion tracking. Customers see it only once.
Order Status Page: This page allows customers to track and manage their orders. They can visit it multiple times through order notifications.

Before, merchants could customize these pages using Additional Scripts and apps with ScriptTags, but Shopify has removed this feature. Now, all merchants must switch to the new system, which supports app blocks and custom pixels.

How to Upgrade Your Pages

Shopify provides an upgrade guide to help you transition based on your current settings and installed apps. If your Thank You and Order Status pages do not require changes, you can simply press ‘Update’ to complete the migration. If you have custom scripts or modifications, you will need to adjust them manually.

Why This Update Matters

  • Improves page performance and security
  • Ensures compatibility with Shopify’s latest features
  • Supports better tracking and customization with app blocks

Need Help with Migration?

If you are unsure how to migrate your Thank You and Order Status pages, I can help:

✅ Migrate existing scripts to the new system

✅ Set up conversion tracking using app blocks and custom pixels

✅ Ensure a smooth transition without losing functionality

✅ Make design or content changes as needed

Act Now – Avoid Last-Minute Issues!

Shopify’s deadline is approaching, and delaying the migration could cause tracking errors or missing order updates. Don’t wait until the last minute!

Upgrade your Shopify store now and stay ahead of the changes!

How to Display Related Products/Posts Using JetEngine Query Builder – Crocoblock

When building a WooCommerce store with Elementor and JetEngine by Crocoblock, you might want to display related products dynamically based on the current product’s category. In this tutorial, I’ll guide you through creating a custom query using JetEngine Query Builder and implementing it on your single product page.

Step 1: Create an Archive Page for Products

First, you need to create an archive page for your WooCommerce products using Elementor. This page will be designed to display all products, and later we will integrate a related product section.

  1. Go to Templates > Theme Builder in WordPress.
  2. Click on Add New Template and choose Archive.
  3. Use Elementor to design the archive layout according to your needs.
  4. Use a Listing Grid (created with JetEngine) to display products.
  5. Publish the template and assign it to the product archive.

Step 2: Create a Query in JetEngine Query Builder

Now, let’s create a query that fetches related products dynamically based on the current product’s category.

  1. Navigate to JetEngine > Query Builder in the WordPress dashboard.
  2. Click Add New to create a new query.
  3. Set a name for the query (e.g., “Related Products”).
  4. Choose Query Type: Posts Query.
  5. In the Post Query section, go to the General tab and:
    • Select Post Type: Products (since we’re working with WooCommerce products).
  6. Switch to the Tax Query tab:
    • Click on Add New.
    • Select Taxonomy: product_cat (Product Categories).
    • Set Field: Term ID.
    • Set Terms: Current Terms -> Products Categories.
    • Set Compare operation: IN.
  7. Save the query.

Step 3: Add the Query to the Single Product Page

After creating the query, the next step is to display the related products on the single product page using Elementor.

  1. Go to Templates > Theme Builder and edit your Single Product Page template.
  2. Drag and drop the Listing Grid widget (created with JetEngine) onto the page.
  3. In the Query section of the Listing Grid settings:
    • Select Custom Query.
    • Choose the query you created earlier (“Related Products”).
  4. Adjust the layout and styling as needed.
  5. Save and update the template.

Conclusion

By following these steps, you can dynamically display related products based on the current product’s category using JetEngine Query Builder. This method ensures that your WooCommerce store provides a seamless shopping experience with relevant product recommendations.

How to Find a Shopify Store URL Without Domain Access

Introduction
When working on a Shopify store, sometimes clients forget to grant you access to the domain section. Without access, finding the store URL can be tricky. However, there’s an easy way to retrieve it directly from the Shopify admin panel. Follow these steps:


Step 1: Log in to the Client’s Store
Access the client’s Shopify admin panel using the provided login credentials.


Step 2: Check the URL Structure
Once logged in, navigate to any section within the Shopify admin, such as the theme settings. The URL should look something like this:

https://admin.shopify.com/store/samamatahir/themes


Step 3: Extract the Store Name
From the URL, locate the text between /store/ and /themes. In this example:

Store Name: samamatahir


Step 4: Construct the Store URL
Now, use the extracted store name to form the Shopify backend login link:

https://samamatahir.myshopify.com/admin


Final Step: Use the URL to Access the Store
Enter the generated URL into your browser, and you should be able to access the Shopify admin panel.


Conclusion
This method is useful when clients do not provide domain access. By following these steps, you can quickly retrieve the store URL and continue working without delays. Always ensure you have the necessary permissions before making any store changes.

How to Migrate Outlook Emails to Google Workspace Seamlessly

If you’re currently using Outlook for your business email (e.g., info@samamatahir.com) and want to move to Google Workspace, the process can be tricky. This guide will walk you through the migration process step by step, ensuring a smooth transition.

Step 1: Understand Your Current Setup

  • Your email (info@samamatahir.com) is connected to Outlook.
  • Your hosting server has MX records pointing to Outlook, making it work with Microsoft services.

Now, you want to migrate to Google Workspace.

Step 2: Sign Up for Google Workspace

When you try to sign up info@samamatahir.com on Google Workspace, you may receive an error:

“This domain name is already in use. If you own this domain and would like to use Google Workspace, please follow the steps here.”

To bypass this issue:

  • Sign up with a different username, such as hi@samamatahir.com.
  • Google will provide a TXT record for domain verification.
  • Add this TXT record to your hosting DNS to verify ownership.

Step 3: Update MX Records to Gmail

  • After verifying the domain, update your hosting server with Google’s MX records.
  • Now, your email hi@samamatahir.com will start working with Gmail.

Step 4: Create Your Main Email Account

  • In Google Workspace, create a new user with the original email info@samamatahir.com.
  • Set a password for this account.
  • Since you’ve already updated MX records, your email info@samamatahir.com is now connected to Google Workspace.

Step 5: Migrate Data from Outlook to Gmail

Even though the email is now set up in Google Workspace, it won’t receive emails yet because Outlook’s MX records are still in the DNS. Before removing them, migrate your existing data:

  1. Log in to Google Workspace Admin.
  2. Navigate to Dashboard > Data > Data Import > Data Migration (New).
  3. Select Migrate from Microsoft Exchange.
  4. Choose Office 365 from the dropdown and click Authenticate (a pop-up will appear).
  5. Sign in to your Outlook account to grant permission.
  6. Add users for migration:
  7. Select the data you want to migrate (emails, contacts, calendar, etc.).
  8. Click Start Migration.

Step 6: Resolving Large Data Migration Issues

If your data spans several years (e.g., 10 years of emails), you might encounter this error:

“The source server is temporarily busy. If this continues, try reducing the number of concurrent requests under Migration settings. (11028).”

Understanding the Error: Throttling Policy

Microsoft applies a throttling policy to limit the rate of data transfers to prevent server overload. This can slow down or interrupt large migrations.

How to Increase the Throttling Policy

To resolve the issue, follow these steps:

  1. Open Microsoft Exchange Admin Center.
  2. Log in to your Microsoft Office 365 account.
  3. Locate the green microphone icon (Contact Support) at the bottom right.
  4. Search for EWS and select Increase EWS Throttling Policy.
  5. Run the test.
  6. When prompted, choose 90 days from the dropdown menu.
  7. Run the test again to apply the settings.

If the migration still shows the same error after one hour, wait up to 24 hours for the changes to propagate, then restart the migration.

Step 7: Finalizing the Migration

  • After data migration is complete, remove the old Outlook MX records from your hosting DNS.
  • Your emails will now be fully functional in Google Workspace.

Congratulations! You’ve successfully migrated your Outlook emails to Google Workspace. 🎉

Maximize Performance with Image Optimization in WordPress

Introduction:
Images play a crucial role in the visual appeal of your WordPress site, but they can also significantly impact loading times and overall performance if not properly optimized. Image optimization is one of the most effective ways to enhance your site’s speed and user experience. Here’s how you can optimize images in WordPress to ensure your site runs smoothly and looks stunning.


Why Image Optimization Matters
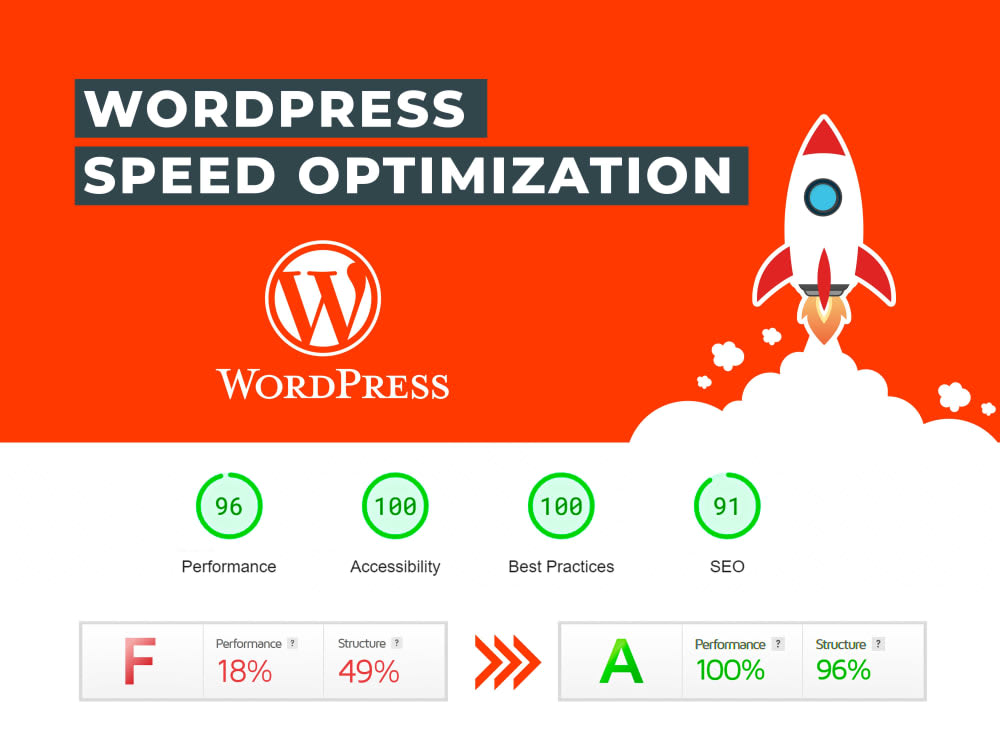
Large, unoptimized images can slow down your WordPress site, which in turn can lead to higher bounce rates and lower search engine rankings. By compressing and optimizing your images, you can significantly improve loading times and keep users engaged.


Key Image Optimization Techniques in WordPress

  1. Use of the Right Image Format
    • JPEG: Ideal for photographs and images with gradients.
    • PNG: Best for graphics, logos, and images with transparency.
    • WebP: A newer format that offers excellent quality at a smaller file size.
  2. Image Compression
    • Use tools like TinyPNG or ShortPixel to reduce image file sizes without compromising quality. WordPress also has several plugins like Smush or EWWW Image Optimizer that automatically compress images when they’re uploaded.
  3. Lazy Loading
    • Implement lazy loading to delay the loading of images until they are needed, which helps improve initial page load times. WordPress plugins like a3 Lazy Load can assist with this.
  4. Responsive Images
    • Use srcset and sizes attributes to display different image sizes based on the device and screen size. This ensures that images load efficiently across all devices.
  5. Adjust Image Dimensions
    • Manually set the width and height of images in the media settings to prevent WordPress from resizing them on the fly, which can impact performance.

Benefits of Image Optimization

  • Faster Load Times: Improved loading speeds can reduce bounce rates and enhance user engagement.
  • Better SEO: Faster load times are a ranking factor for search engines, helping you rank higher.
  • Improved User Experience: A visually appealing, fast-loading site keeps visitors happy and encourages them to stay longer and explore more content.

Conclusion
Optimizing images in WordPress is a simple yet powerful way to improve your website’s performance and user experience. By following best practices for format, compression, lazy loading, and responsiveness, you can create a fast, visually appealing site that engages visitors and ranks well on search engines.

Ready to make your WordPress site faster? Start optimizing your images today!

Unlock Endless Possibilities with Shopify Checkout Extensibility

Introduction:
Shopify has always been a leader in e-commerce innovation, and their Checkout Extensibility takes customization to a whole new level. Whether you’re a developer or a store owner, this powerful feature enables you to craft unique, high-performing checkout experiences tailored to your brand and customers.


What is Checkout Extensibility?
Shopify Checkout Extensibility allows you to go beyond the default checkout layout and functionality. With access to APIs, apps, and custom code, you can modify the checkout process to meet specific business needs while maintaining security and performance.


Key Features of Shopify Checkout Extensibility:

  1. Custom Branding:
    • Add personalized elements like logos, colors, and typography to align the checkout with your brand identity.
  2. Dynamic Discounts and Promotions:
    • Display exclusive offers or discounts directly at checkout to drive conversions and increase cart value.
  3. Third-Party Integrations:
    • Seamlessly integrate loyalty programs, payment gateways, or analytics tools for a smarter checkout experience.
  4. Enhanced User Experience:
    • Simplify complex processes like multi-step checkouts or localized payment methods to improve customer satisfaction.
  5. Future-Proof Flexibility:
    • Shopify’s extensibility is designed to evolve with your business, ensuring your checkout can adapt to market trends and customer preferences.

Why It Matters for Your Business:
A customized checkout experience is more than aesthetics; it’s about building trust and improving conversions. Shopify Checkout Extensibility empowers you to:

  • Reduce cart abandonment rates.
  • Increase customer loyalty with tailored experiences.
  • Drive repeat sales by integrating rewards programs or subscription options.

Getting Started:
Shopify has made it simple for developers and store owners to start leveraging Checkout Extensibility. Whether you use apps from the Shopify App Store or collaborate with a developer for custom solutions, the possibilities are endless.


Conclusion:
Shopify Checkout Extensibility is the ultimate tool for creating a checkout that reflects your brand and meets your customers’ needs. By enhancing functionality and user experience, it enables your e-commerce store to stand out and succeed in a competitive market.

Ready to elevate your Shopify store? Let’s build a checkout experience that converts visitors into loyal customers!

Streamline Discussions with Elementor’s New Comment Feature

Introduction:
Collaboration just got easier with Elementor’s new Comment Feature. Whether you’re working with a client or a team, this feature simplifies feedback and accelerates project timelines.

How It Works:

  • Clients or collaborators can leave comments directly on live page previews.
  • Comments are tied to specific elements, making it easy to identify and implement changes.
  • Developers and designers can track feedback in real-time, ensuring smooth communication.

The Bottom Line:
This feature bridges the gap between designers and clients, improving efficiency and transparency. With Elementor’s comment feature, delivering a perfect website has never been easier!

Unlock the Power of Elementor AI for Smarter Website Design

Introduction:
Say hello to the future of web design with Elementor AI, a game-changing feature that streamlines the design process like never before. Whether you’re a developer or a business owner, Elementor AI helps you build stunning, responsive websites effortlessly.

Key Benefits of Elementor AI:

  • Content Generation: Automatically generate SEO-optimized headings, subheadings, and descriptions tailored to your audience.
  • Code Assistant: Get instant CSS, HTML, or JavaScript snippets for custom functionality.
  • Image Editing: Use AI tools to adjust and enhance images directly within Elementor.

Why It Matters:
Elementor AI saves time and boosts creativity, allowing you to focus on your brand’s unique identity while letting AI handle repetitive tasks. Ready to supercharge your workflow? Try Elementor AI today!